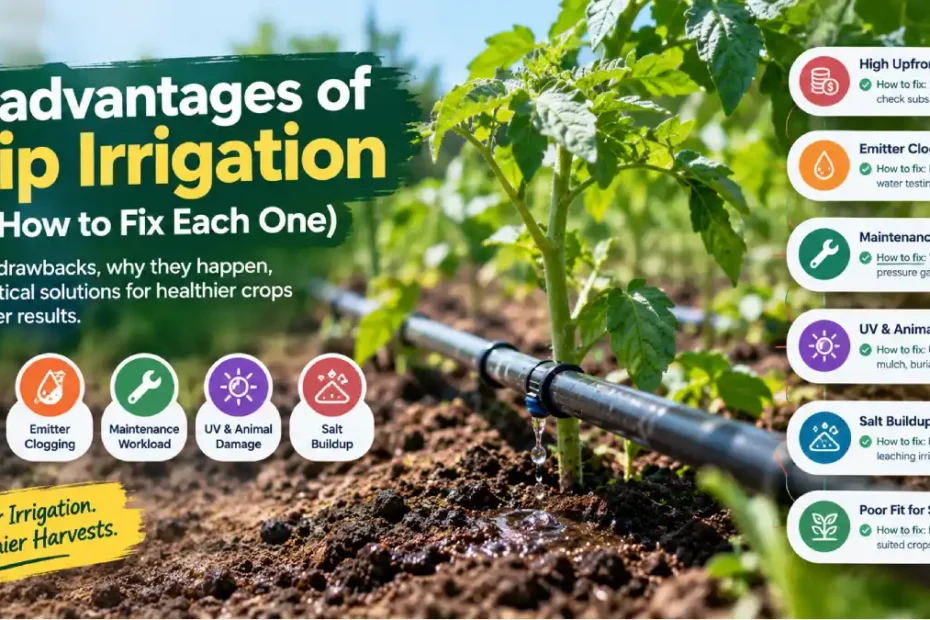
Quick answer: The main disadvantages of drip irrigation are high upfront cost, emitter clogging, regular maintenance, UV and animal damage to tubing, salt buildup in the soil, and poor suitability for closely spaced or flooded crops. Most of these problems can be reduced with good filtration, proper design and routine checks, which is what this guide covers.
Drip irrigation is often called the most water-efficient way to irrigate, and for good reason. It delivers water slowly to the root zone, so very little is lost to evaporation or runoff. But no irrigation method suits every farm, garden or budget.
Many growers install a system expecting it to run itself, then run into clogged emitters, damaged tubing or uneven watering a season later. This guide explains the real drawbacks of drip irrigation, why each one happens, and how to fix it. If you’re still deciding whether drip is right for you, read our guide on the advantages of drip irrigation alongside this one. If you’re new to the method, start with what drip irrigation is and how it works.
Disadvantages of Drip Irrigation at a Glance
| Disadvantage | Why it happens | Best fix |
| High upfront cost | Pipes, filters, emitters, fittings and labor | Phase the install; check subsidies |
| Emitter clogging | Sand, silt, algae, mineral scale | Filtration, flushing, water testing |
| Maintenance workload | Many small parts that can fail | Weekly checklist, pressure gauge |
| UV and animal damage | Sun degrades plastic; rodents chew | UV-stabilized tubing, mulch, burial |
| Salt buildup | Salts collect at the edge of the wet zone | Periodic deep leaching irrigation |
| Poor fit for some crops | Fixed emitter layout | Plan layout; use for suited crops |
| Weak seed germination | Wet zone may miss the seedbed | Pre-irrigate or use closer spacing |
| Plastic waste | Thin tape is often single-season | Durable lines; recycle |
| Design errors | Pressure loss, slopes, long runs | Pressure regulators and proper design |
1. High Upfront Cost
The problem: Drip irrigation costs more to install than most traditional methods. You pay for mainlines, sub-mains, laterals, emitters, filters, valves, fittings, and often a pump and pressure control. The cost goes up when crops are widely spaced or the field is irregular, because more tubing is needed to reach each plant.
Why it matters: For small and marginal farmers, the cost is often the biggest reason drip never gets adopted, even when the long-term water savings are clear.
How to fix it:
- Install in phases. Start with your highest-value or most water-sensitive crop, such as vegetables or orchard trees, and expand later.
- Choose the right grade. Thin drip tape is cheaper but short-lived. Thicker, more durable lines cost more upfront but suit perennial crops where they stay in place for years.
- Check government support. In India, schemes such as Pradhan Mantri Krishi Sinchayee Yojana (PMKSY, “Per Drop More Crop”) support micro-irrigation, with rates and eligibility varying by state. Confirm current details with your local agriculture department.
- Do the maths per crop. Compare installation cost against water saved, labor saved and yield gain over several seasons, not just one.
2. Emitter Clogging
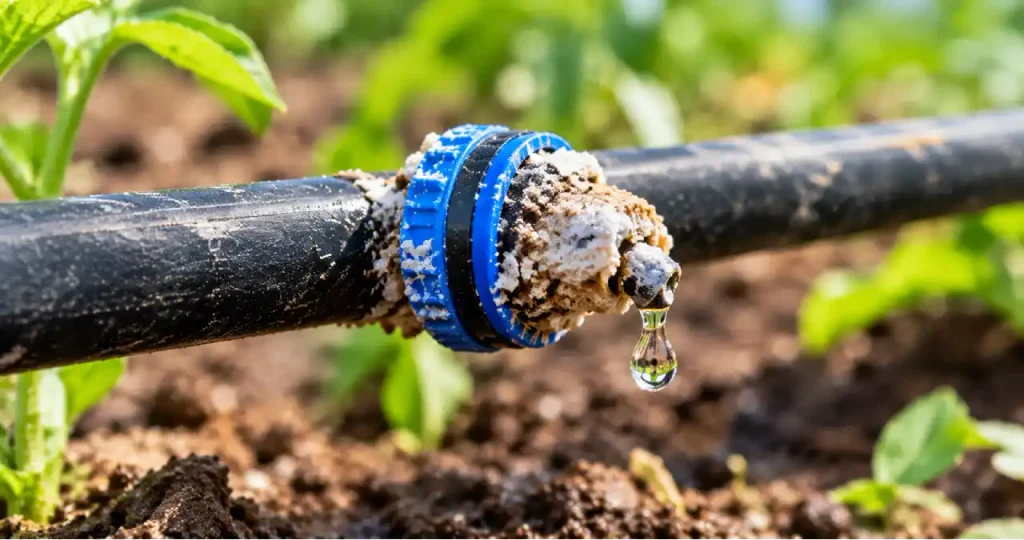
The problem: Drip emitters have very small openings, so even tiny particles can block them. Clogged emitters cause uneven watering, so some plants get too little while others are fine.
Why it happens: Clogging usually comes from three sources:
- Physical: sand, silt and organic debris in the water.
- Chemical: mineral scale, especially in hard water with calcium or iron.
- Biological: algae and bacterial slime, which grow faster in warm, sunlit water.
How to fix it:
- Install proper filtration. Screen, disc or sand filters (or a combination) are the most important part of any drip system. Match the filter type to your water source. Well water often needs less filtration than pond or canal water.
- Flush the lines. Open the end caps of laterals regularly to flush out sediment.
- Clean filters on schedule. A dirty filter reduces pressure and flow.
- Treat the water when needed. Acid treatment can dissolve mineral scale, and chlorination can control algae and slime. Follow product instructions carefully and test on a small section first.
- Keep tanks covered. This limits algae growth in stored water.
- Test your water. A basic water analysis tells you what you’re dealing with. Our guide on why soil and water testing matters explains how to get started.
3. Regular Maintenance and Monitoring
The problem: Drip irrigation is not “install and forget.” Because water flows through many small parts, problems can go unnoticed. You can’t easily see a clogged emitter or a small leak under mulch, so plants may suffer before you realize something is wrong.
How to fix it:
- Check the system weekly during the growing season. Walk the lines and look for wet or dry patches, damaged tubing and disconnected fittings.
- Install a pressure gauge at the start of the system. A sudden drop or rise often signals a clog or leak.
- Add a flow meter if possible, to catch unexpected changes in water use.
- Keep spare parts such as emitters, connectors, end caps and a few meters of tubing, so repairs take minutes.
- Automate carefully. Timers and soil moisture sensors reduce labor, but they don’t replace inspection. For more on pairing technology with traditional practice, see our guide on integrating technology with traditional farming.
4. UV Damage and Animal Damage
The problem: Plastic tubing left in direct sun becomes brittle and cracks over time, shortening its working life. Rodents, birds and some insects also chew or puncture lines, creating leaks.
How to fix it:
- Buy UV-stabilized tubing designed for outdoor use.
- Cover lines with mulch where the crop allows it. This protects against sun and also reduces weeds and evaporation.
- Bury lines (subsurface drip) where suitable, which also protects them from many animals.
- Store tubing properly in shade between seasons, coiled loosely and away from rodents.
- Control pests around the field with traps, clean field edges or fencing, and repair chewed sections promptly.
- Be careful with tools. Hoes, weeders and spades are a common cause of accidental cuts.
5. Salt Buildup in the Soil
The problem: Drip irrigation wets only part of the soil. As water moves outward and evaporates, dissolved salts can accumulate at the edge of the wetted zone. Over time, high salt levels can stunt plants and reduce yield, especially where irrigation water is already salty or rainfall is low.
How to fix it:
- Test your irrigation water and soil for salinity before and during the season.
- Leach salts periodically. An occasional deeper irrigation, or good natural rainfall, pushes salts below the root zone. Drainage must be adequate for this to work.
- Place plants and seeds carefully. Avoid putting seeds right at the salty edge of the wet zone.
- Use enough emitters per plant so that the wet zone covers a sufficient part of the root area.
- Improve soil organic matter, which helps soil structure and buffering. Our guide on improving soil fertility naturally covers practical options.
6. Not Suited to Every Crop or Layout
The problem: Drip irrigation works best for crops planted in rows or with fixed spacing, such as vegetables, fruit trees, grapes, sugarcane and cotton. It is a poor fit for:
- Flooded crops such as paddy rice.
- Densely sown or broadcast crops.
- Dense raised beds with very close plant spacing.
- Lawns and large turf areas, where sprinklers are usually more practical.
Crop rotation adds another challenge. Emitters spaced for tomatoes won’t suit onions planted a few centimeters apart. Lines may need to be moved or replaced when the crop changes.
How to fix it:
- Use drip where it fits best, such as orchards, vegetables and high-value row crops, and keep other methods for the rest.
- Choose flexible lines. Drip tape with closely spaced emitters can adapt to more crop spacings than widely spaced lines.
- Plan rotation around your layout. Our crop rotation guide can help you design a rotation that works with fixed irrigation lines.
7. Poor Seed Germination in Some Soils
The problem: Drip irrigation wets a limited strip of soil. In light, sandy soils, water may move straight down rather than spreading sideways, so the surface layer where seeds sit can stay dry. Subsurface drip has the same problem, since water is released below the seedbed.
How to fix it:
- Pre-irrigate or use sprinklers for the first days after sowing to wet the seedbed, then switch to drip.
- Use closer emitter spacing in sandy soils so the wet zones overlap.
- Transplant seedlings instead of direct seeding for sensitive crops.
- Check seed zone moisture by hand rather than assuming the system has done its job.
8. Plastic Waste
The problem: Thin drip tape is often replaced every season, which creates plastic waste. If it’s left in the field, it can interfere with the next crop and add cleanup labor after harvest.
How to fix it:
- Use durable, thicker-walled lines for perennial crops and multi-season use.
- Collect tape promptly after harvest rather than leaving it to break into pieces.
- Look for local recycling options for agricultural plastic.
- Reuse components like fittings, valves and filters, which last much longer than the tubing.
9. Design and Installation Mistakes
The problem: A poorly designed system wastes the water and money it was meant to save. Common mistakes include laterals that are too long, mixing emitters with different flow rates, ignoring slope, and using pumps that are too small or too big. The result is uneven watering, with plants at the end of the line or the bottom of a slope getting a very different amount of water than the rest.
How to fix it:
- Get the design checked by a dealer, agronomist or extension officer, especially for larger fields.
- Use pressure regulators to keep pressure steady.
- Consider pressure-compensating emitters on sloping land or long runs. They keep output more uniform across pressure changes.
- Follow the manufacturer’s maximum lateral length for your tubing size and flow rate.
- Test uniformity after installation. Place cups under several emitters along a line and compare how much water each collects in the same time.
When Drip Irrigation May Not Be the Right Choice
Drip irrigation may not be worth it if:
- You grow flooded or densely broadcast crops.
- Your only water source is very dirty and you can’t afford proper filtration.
- You have a very small or temporary plot where a hose or watering can is more practical.
- You can’t commit to regular inspection and maintenance.
In these cases, sprinklers, furrow irrigation or simple hand watering may be better.
Drip vs Sprinkler vs Flood Irrigation
| Factor | Drip | Sprinkler | Flood/Furrow |
| Water efficiency | Very high | Moderate | Low |
| Upfront cost | High | Moderate | Low |
| Maintenance | High (filters, emitters) | Moderate | Low |
| Clogging risk | High | Low | None |
| Best for | Row crops, orchards, vegetables | Field crops, lawns | Paddy, level fields |
| Labor | Low once set up | Moderate | High |
For more options, see our overview of irrigation methods and the wider guide to water conservation methods in farming.
Quick Drip System Maintenance Checklist
Weekly
- Walk the lines and look for leaks, wet spots and dry patches.
- Check the pressure gauge reading.
- Clean or rinse filters if the pressure has dropped.
Monthly
- Flush all laterals by opening the end caps.
- Check emitters on a sample of plants.
Each season
- Test water quality and soil salinity.
- Inspect tubing for UV cracks and rodent damage.
- Replace worn emitters, connectors and seals.
- Store tubing out of direct sun after harvest.
Conclusion
Drip irrigation is a powerful way to save water and feed plants efficiently, but it’s not free of drawbacks. Cost, clogging, maintenance, UV and animal damage, salt buildup and layout limits are real issues, and each one has a practical fix. The key is to plan for them before you buy: filter your water, design the system properly, inspect it regularly and use it on crops where it fits best.
If you’ve weighed the problems above and still think drip is right for you, our guide to the advantages of drip irrigation covers what you stand to gain.
Read more on Farm.ws:
- Advantages of Drip Irrigation: 9 Proven Benefits & Costs
- What Is Drip Irrigation?
- Water Conservation Methods in Farming
Frequently Asked Questions
For most farmers, the biggest disadvantage is the high upfront cost, followed closely by emitter clogging. Clogging can be reduced with good filtration and regular flushing.
It can, because emitter openings are very small. Dirty water, hard water and algae all raise the risk. Proper filters, regular line flushing and water testing keep most systems running well.
Often yes, especially for vegetables, fruit trees and other high-value row crops, since it saves water and labor. Starting with a small section and expanding later helps spread the cost.
It depends on the product and how you use it. Thin drip tape is often replaced every season or two, while thicker lines can last several years if they are protected from sun and animals.
Yes. Salts can build up at the edge of the wetted area, especially with salty water or low rainfall. Periodic deep irrigation and good drainage help flush them below the root zone.